Okay ladies and gents. After about two months of cloth diapering, I think I finally have the hang of this thing. DISCLAIMER, I am by no means an expert, but this post is meant to be a break down of the different types of cloth diapers. Since starting many of my friends have also told me that they would like to learn more about CDing.
So welcome to hello sunshine's CD Tutorial
When starting out the most overwhelming thing can be deciding which route you would like to go, mostly because the terminology can be so intimidating! So we will go slow.
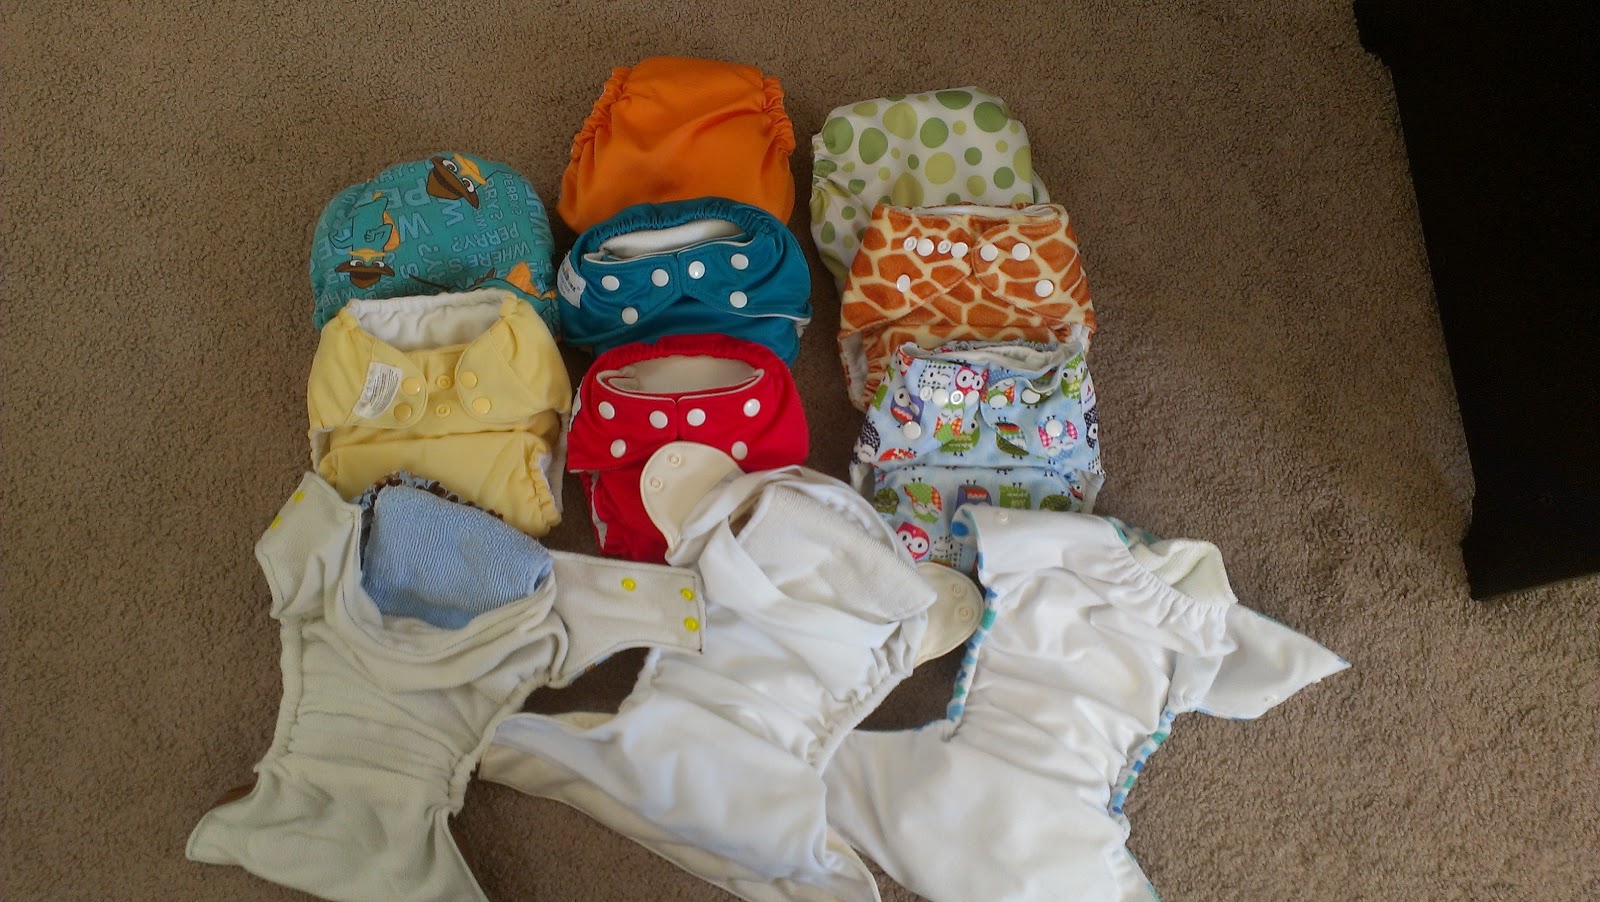
The most basic form of CDing would be pre folds and covers. This is old school with a twist. Prefolds haven't changed, they are still a rectangular piece of fabric that has a thicker middle section that is meant to be the absorbent area. If you opt to wrap the prefold around your baby you can still use Pins, or there is a much less nerve wracking option called a snappi. This is a stretchy plastic contraption with small (and much less sharp) hooks to hold everything down. Or you can opt to go without entirely since the cover will hold everything it. and speaking of covers, it's covers that have gotten a modern makeover. Plastic pants have been done away with. Now covers are made from fabric with an inner waterproof layer of PUL (polyurethane laminate). Instead of pins now covers either come with snaps or Velcro(often referred to as aplix or hook and loop) that mimics disposables (aka, sposies). There a many covers out there, but here's what I use.
One size Flip cover with snaps.
Another option would be pocket diapers. Pocket diapers have the same waterproof layer as a cover and a layer of some type of stay dry fabric on top of that which is what sits against baby's skin. Either at the front or back of the diaper there will be a pocket in which one would stuff an absorbent insert, usually microfiber. With these diapers once baby goes, so does the diaper, it's time to wash. The plus side to pockets is that they tend to wear really well over time, so if you're hoping to CD multiple children, pockets will generally be the best bang for your buck. A downside would be that there is just a few more steps involved. These diapers also can come in specific sizes based on weight ranges, or you can purchase one size diapers that come with rise snaps so you can adjust how tall the diaper is, and either waist snaps or Velcro to get a snug fit. The majority of my stash is one size pockets, but I hope to CD any future kids as well.
One size Alvas, Fuzzibunz, and Bumgenius
Next are all in ones (AIO). All in one diapers are the easiest in that everything is all sewn in, there is nothing you need to stuff, wrap, or pin down. These are the most similar to sposies. Therefore, these are the most expensive. These also have a layer of PUL, but everything absorbent about the diaper is sewn down(either partially just on the ends or all the way), so all the changer has to do is take off the dirty diaper and put on a new one. I use these diapers when I change a diaper the go (my diaper bag stash).
Bumgenius all in one Freetimes
A similar option is an all in 2 (AI2). These diapers are (to my best understanding, I do not have any however) similar to a cover with absorbent inserts that snap in, so they fit similarly to the all in ones, but when the insert is dirtied you can just pop the insert out and snap a new one in.
And now, to close out the diaper portion of my tutorial, we have fitteds and hybrid fitteds. Fitteds have a special place in my heart because they changed night times for us. I can now sleep through the night because my son no longer wants to be changed in the middle of the night. Regular fitted diapers are made of ultra absorbent fabric, but they have no waterproof layer, so they DO need a cover over. But when they have a cover, man, do they contain a have wetter.
NOW, hybrid fitteds are like cloth gold around here. Hybrid fitteds also do not have the waterproof layer, but many inner layers of absorbent fabric that suck up any and all moisture and and outer layer of fleece that repels moisture back into the inner layers of the diaper to ensure the outside stays dry. The best part is the inside of these is made with a soft stay dry fabric (like velour) that wicks moisture away from the skin and keeps baby nice and comfy. Here's ours.
Gray star boutique hybrid fitteds
Now that you know the different types, here's how to care for them!
Diapers should not be washed in standard detergent as it has soaps and brighteners that can build up in the diapers and cause all sorts of problems (ammonia build up, bacteria, stink...oh my!). You can buy a cloth diaper specific detergent like Rock n Green or Bumgenius detergent, but for the most part, those are just an expensive alternative to something you can get much cheaper. Pretty much any free and clear detergent you would use for your baby's clothes will do (although as of late I have also been hearing to be wary of all liquid detergents), but
here is a link to a helpful chart of which detergents are safe and which are not. If you want an all natural option, soap nuts are amazing, and can be made into a powder or a liquid (stay tuned for my recipe and a tutorial on how I make it).
Now every washing routine can vary, ask 5 CDers, you will get 5 different answers. It really depends on your water, how often your washing, detergent, etc. Generally, you will have a pre-rinse, a hot wash with detergent (possibly a second hot wash without) and an extra cold rinse. I do a cold rinse, hot wash with soap, hot wash no soap, extra cold rinse and it works for me; no build up, no stink.
Finally, anything with a pul layer should be line dried, all others can go through the drier.
**BONUS** It occured to me after the fact that I didn't talk about diaper creams, and I really should. Diaper rashes can be awful and have the power to make even the most capable and confident parent feel like a big ole pile of poo if they can't fix it. The go to with Sposies is some type of (usually) zinc and/or petroleum based cream. BIG CD NO NO. When used regularly in CDs, creams can actually ruin cloth diapers (don't worry if it happens on accident, there might be a stain but the diaper should be fine). There are some cloth diaper safe creams on the market and
here is where you can see a break down on what's good and bad. Also, for a natural alternative, we use coconut oil on any sign of irritation and so far that has kept rashes away.
Let's be real though, some diaper rashes are just down right awful and putting oil on it just isn't going to cut it. If you find your baby with an awful rash and your gut tells you to reach for the desitin or butt paste, there is a way!!! You can buy fleece or disposable liners that you would put between baby and diaper to keep the cream from getting on the fabric. You would also need to do this for circumcision care if you plan to cd a newly circ'd baby.
What anyone starting out should know is that cloth diapering is NOT scary, and it is much easier than you think. The actual diapering portion is no different that putting a sposie on a baby's butt. The only extra thing is one extra load of laundry every other day (you can stretch this to wear two days and wash on the third, but it should not be stretched longer than that). The plus side is, for the first six months of a baby's life, while they are on a purely liquid diet their poo is 100% water soluble, therefore all you have to do is take the dirty dipe and drop it in the laundry. Once they start solids you will want to get a diaper sprayer to spray off the poo or just do a quick dunk in the toilet. If you're thinking about CDing, DO IT! You will love it! It may not be for everyone, but man is it for us!


.jpg)